
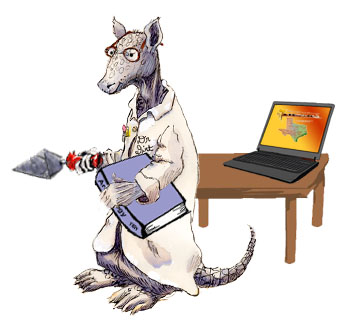
Hey, Kids! I'm Dr. Dirt, ready to help you explore Texas Beyond History.
Just like the state of Texas, this website is BIG! In fact, there are more than 1000 pages in here, and it's easy to get lost.
So, I have put together this handy guide for you to use, whether you are doing a research paper for class or just prowling the site for fun. Happy trails!
Great archeology begins with research. Follow these steps to write a great research paper using information from Texas Beyond History:
Step 1: Choose your topic and do your research
Click on a topic on the notebook page that interests you or explore the subject tables!

|

|

|
|

|
|
|||||||||||||||||
|
|
|
|
|
|||||||||||||||||||
|
|

|
|
|
|||||||||||||||||||

|
|
|||||||||||||||||||||
|
|
|
|||||||||||||||||||||
|
|

|

|
|
|||||||||||||||||||
|
|
 |
|
|
|||||||||||||||||||
|
|
|
|||||||||||||||||||||
|
|
|
||||||||||||||||||||
|
|
|||||||||||||||||||||
|
|
|
|
|
|||||||||||||||||||
|
|
|
|||||||||||||||||||||
|
|

|
|
||||||||||||||||||||
|
|
|
|||||||||||||||||||||
|
|
|
|||||||||||||||||||||
|
|
|
|
|
|||||||||||||||||||
|
|
|
|
|
|||||||||||||||||||
|
|
|||||||||||||||||||||
|
|

|
|
||||||||||||||||||||

|
|
|||||||||||||||||||||

|
|
|||||||||||||||||||||
|
|
|
|
|
|
|
|
|
|
|
|
|
|
|
|
|
|
|
|
|
|
|
|
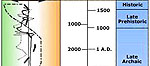
Texas Indians (before about 1500)
 |
Prehistoric "Texans" |
Did you know that more than 540 generations of people have lived in Texas? That's a lot of grandmothers, great-granfdathers, great-great-great...well, you get the idea. |
|
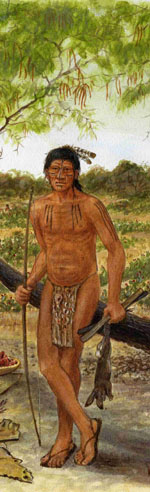
Paleoindians (Clovis culture) |
Clovis people at Kincaid Shelter, Texas hill country
Be sure to take Dr. Dirt's Time Travel Adventure to learn how Clovis people paved the floor of their muddy shelter. Clovis people on Buttermilk Creek (Gault site)This site has been in the news a lot lately. Here we found what may be the oldest art in the Americas: carved pebbles! |
|
|
Archaic |
Archaic (southwest Texas)
Learn about the Archaic hunter-gatherers who visited Hinds Cave for thousands of years. (Don't miss the Detectives into the Past adventure, to learn about what was on the Archaic menu!) Archaic (central Texas)People lived on the banks of the Medina River for more than 10,000 years (we call the area the Richard Beene archeological site). Most people who lived there were Archaic hunters and gatherers. Check out Doorways to the Past to "visit" some of the camps. |
|
|
Late Prehistoric |
Late Prehistoric (north)
There was lots of conflict during the Late Prehistoric time period. Archeologists excavated a cemetery at the Harrell archeological site on the Brazos River and found signs of violence and warfare, probably due to competition over territory, land, and water. Late Prehistoric (north central)Here's an example of what we learned about native peoples living along the Little River from about 700 to 1400 years ago at a place called the J. B. White site. Check out Mussel Mania to learn more about a favorite food. Late Prehistoric (central)Learn about an encampment on the Llano River in the Texas mineral region. Late Prehistoric (south)Late Prehistoric campers at this south Texas site were successful hunters and gatherers, bringing in not just deer, antelope, and buffalo, but also rodents and plants.The people who lived here likely were the ancestors of the south Texas groups we call the Coahuiltecans. |
|
| Panhandle Plains Villagers |
These Late Prehistoric people were corn farmers and buffalo hunters who lived along the Canadian River and Wolf Creek in the Texas Panhandle. Archeologists have found ruins of some pretty unusual looking houses: they were built of wood posts in pits and covered with straw roofs. Check out the ruins of Hank's House; it was named for Hank the Cowdog because it was found on the author John Erickson's ranch! |
|
|
Jornada Mogollon |
Firecracker Pueblo
Pueblos and pithouses in Texas? Yup, lots of them! Corn farming on the arid desert? No problem. Take a look at what archeologists found in El Paso at a place they called Firecracker Pueblo. Ceremonial CaveOr, explore Ceremonial Cave, where Jornada-Mogollon people left incredible offerings, such as turquoise and shell bracelets, weapons, and other items. The evidence tells us a lot about trade, long-distance connections, and the religious beliefs of these people across a wide area stretching into New Mexico and the greater Southwest. |
|
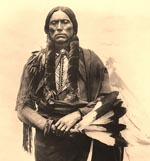
Historic Period Tribes and Groups (after about 1500)
 |
Apache | ||
|
Kiowa |
Kiowa People
Learn about the Kiowa people and their rich history through words and pictures. Kiowa's violent conflictsThen read about the Kiowa's violent conflicts with U.S. soldiers on the north Texas frontier, as each side battled for territory. |
||
|
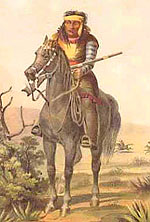
Comanche |
The Die Is Cast
Here you will learn about the famous Comanche chief Quanah Parker and the reasons behind the war on the Texas frontier. Indian Intruders from the NorthMore about the Comanche and other Plains Indian groups in Texas. |
||
|
Tonkawa |
Meet a Tonkawa Woman
"Captain Dirt," the Frontier reporter, interviews a Tonkawa woman selling moccasins near Fort Griffin on the north Texas frontier. Tonkawa ScoutCaptain Dirt also meets a Tonkawa scout serving the U.S. Army. (These conversations, based on historical accounts, make the Tonkawa appear rather dumb because they talked in half-sentences and used poor grammar. In fact, many Tonkawa and members of other tribes could speak and communicate in several languages, including English, Spanish, and other tribal dialects.) Indian Intruders from the NorthLearn about Tonkawa history and that of other Plains groups in Texas. |
||
| Coahuiltecan |
Learn about these groups of south Texas hunter-gatherers and what we mean when we use the term "Coahuiltecan." |
||
|
Caddo |
World of the Caddo
In this fun interactive you will "meet" the Caddo and learn about their village life, step inside a grass house, visit a museum, and learn about how archeologists and others study this ancient culture. Who Are the Caddo?Provides more detail about the Caddo today and their rich history. Sha'chahdinnihLast Village of the Kadohadacho in the Caddo Homeland in Texas. |
||
| Gueiquesale |
Texas was once home to hundreds of small native groups such as the Gueiquesale. Europeans and hostile Plains Indians brought disease and warfare that wiped out most of the small Texas groups. Although there are no known surviving Gueiquesale, we can learn about them through Spanish records from the 1600s. |
||
| Aranama |
In Native Peoples in a Spanish World, we can learn about the coastal Texas group called the Aranama and how their life changed in a mission setting. |
||
Other Indian Cultures
Cultural Periods
Indian Lifestyles
 |
Hunting |
||
| Hunting and Gathering Life |
Plant gathering
Click on this interactive picture to see actual tools and items used by ancient hunter-gatherers |
||
|
Foods |
What's for Dinner?
Explore many kinds of prehistoric foods and cooking techniques in this fun interactive. What Did Ancient Texans Eat?Get the scoop by looking at prehistoric poop! |
||
|
Cooking |
Camp Bowie
At Camp Bowie, learn about archeological sites known as burned rock middens and how prehistoric "chefs" baked onion bulbs and other plants in the ground! Honey CreekLearn more about prehistoric plant cookery using hot rocks at Honey Creek. Hot Rock CookingConfused?? Dr. Dirt explains Hot Rock Cooking. |
||
|
Houses and Shelters |
Prehistoric Houses
Takes you on a tour of ancient houses across the state, from tipis to rockshelters. Life in a RockshelterLearn about Life in a Rockshelter by exploring this interactive scene. Hinds CaveThen read more about the evidence from Hinds Cave. Plains Villager house slabhouseRead about how to build a Plains Villager house slabhouse. |
||
|
Burial of the Dead |
The Loma Sandia cemetery
Explore a prehistoric burial scene to see actual artifacts found at the Loma Sandia cemetery in south Texas and other cemetery sites. Leanne's BurialOne of the oldest burials in North America and it's right here in Texas, near Leander. Learn more about this young woman, how she was buried nearly 11,000 years ago, and and how she was discovered. A Prehistoric Cemetery: Mass Burials and MutilationsTells of Late Prehistoric cemetery in north Texas, where archeologists found evidence of violent conflict. Mounds of MysteryLearn about the burial mounds where ancient Caddo buried their leaders. |
||
| Economy | |||
|
Tools and Weapons |
Everday, Extraordinary Things
Shows examples of objects made by native peoples in southwest Texas, including what may be a child's backpack! Hinds Cave ArtifactsFull of pictures of amazing bits and pieces of sandals, basketry, floor mats, and tools used by Archaic people. Learn how archeologists use microscopes to examine "dirty tools" to learn what they how they were used. What the Artifacts Tell UsCovers a wide variety of tools made of stone, bone, and shell. |
||
| Prehistoric Stone Quarrying | |||
| Buffalo | |||
|
Indian Art and Ritual |
Artistic Expression of the Plateaus and Canyonlands
Huge, haunting, and weird paintings on canyon walls. Artistic Expression of the South Texas PlainsBeautiful carved shell jewelry and even tattoos! |
||
|
Native Pottery |
Created in Clay
Learn about the amazing pottery made by the ancient Caddo Indians of East Texas, Oklahoma, Louisiana, and Arkansas. Pottery GalleriesBe sure to go to the Pottery Galleries where you can see 3-D photos, zoom in and rotate the pots with your mouse. Making Cordmarked PotteryExamines how pottery was made by the Plains Villagers of the Texas Panhandle from about 500 to 100 years ago. |
||
| Trading (with French) | |||
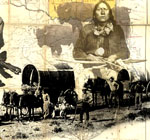
Life for Indians Changed Forever
European Settlers and Traders
Spanish Explorers

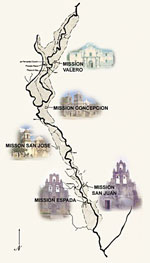
Spanish Missions and Presidios
US Soldiers
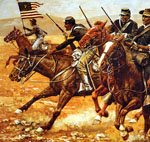
Frontier, Western Movement, and Indian Wars (1850-1885)
Civil War in Texas
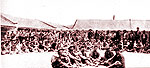
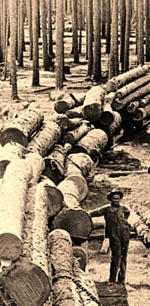
Industry (19th- and 20th-Century)
Texas Geography
 |
Natural Resources: Picture Galleries of Plants, Animals, Rocks and Minerals |
||||
|
Environmental Regions of Texas |
South Texas Plains (explore a regional map) Edwards Plateau and Southwest Canyonlands (explore a regional map) |
||||
|
Rivers and Streams: Impact on Landscape |
Stratification in Action: watch a Texas river build up deposits and cover |
Climate Change over Time
Picked your topic and researched it? Move on to step two!
Step 2: Write your paper
Now... think about what you have learned from your research and explain it in your own words. Begin by organizing your thoughts into an outline. Create a simple outline by following these steps. Remember that you can always add more sections, but this is the basic framework.
How to Draw an Outline
- Begin with an opening paragraph, or introduction. In your outline, label this with the Roman numeral one (I). In this section you will tell the reader what your paper will be about.
- Decide on at least three of the most important things you want to discuss. In your outline, indent under the opening paragraph and label these: A, B, and C.
- For each of these important things, think of two or three things to say about them such as explanations, details, or specific examples. Indent again and label these: a, b, and c. Repeat this step for B and C.
- The end of your paper should be a closing paragraph. In your outline, label this as Roman numeral II. Here you will summarize what your paper was about and state your conclusions.
Your outline will have a format similar to this:
- I. Opening Paragraph
- A. Important Thing 1
- a. detail 1
- b. detail 2
- c. detail 3
- B. Important Thing 2
- a. detail 1
- b. detail 2
- c. detail 3
- C. Important Thing 3
- a. detail 1
- b. detail 2
- c. detail 3
- II. Closing paragraph
Great!!! You have now organized the "structure" of your paper. You now know what to discuss 1st, 2nd, and last. You are ready to turn your outline into complete sentences using correct grammar. Make sure to check your SPELLLING! Oops, SPELLING, that is.
Writing Tips: Sometimes, during your research, you will read a sentence or phrase that perfectly represents or explains your point, but you should not copy someone else's work. That is called plagiarism, and it is cheating. It is both stealing someone else's hard work and ideas, and stealing away your own chance to learn and grow your writing skills.
But don't fret! You can include the information without stealing it in one of two ways:
Paraphrase with citation (reference): Put the information into your own words. Make the same point as the original text but say it in a different way using different words. But you must be straightforward about where you found this information (you didn't think of it all yourself) and give credit to the person who had the idea. At the end of the sentence or paragraph write the name of the author and the date it was published within parentheses. This is called a citation. So if this sentence was a paraphrase, the author's name and publication date goes here ("author's name" "date it was published"). Then place the period after the citation and continue on with your paper. You will include a full list of all these citations, or reference sources, in Step 3.
Quotation with citation (reference): If you really like the way another author expressed a thought or idea, use the original words but give credit to the author. Put quotation marks around the text and, within parentheses, provide a reference to where it came from. Include the name of the author and the date it was published, followed by the page number where you found the original text. For example, let's say you liked what anthropologist William Newcomb said at the end of his chapter about the Karankawa Indians in his book, The Indians of Texas. To make it clear you are going to use his words, refer to him specifically, then give his words, then give the citation to his book. Here's how that might look:
As anthropologist William Newcomb said, "The Karankawas of the Texas Gulf Coast are gone, yet they will forever stir our imaginations. Perhaps this is because, unlike ourselves, they faced daily and directly the stark realities of remaining alive" (Newcomb 1961: 81).
So that's it! You used another author's words and ideas and you've given credit with a reference.
Way to go! You are almost finished!
Step 3: Cite your sources
Okay, you have written your paper. You've read it over again (several times) to check spelling, punctuation, and grammar. The last thing you must do is tell your reader where you got your information. This consists of a list at the end of your paper. This list is known by many names including the terms Sources, Bibliography, References, Works Cited, Works Consulted, and many more.

Here, we will use the terms Works Consulted and Works Cited. The Works Consulted list should contain all of the sources, such as books, articles in magazines, or internet pages you consulted to learn about your topic. Works Cited should contain all of the sources you "quoted" in you paper. You will probably have both, in which case the list can then be titled: Works Cited and Consulted.
The format of the citation will depend on the source material (book, article, magazine, internet source, for example) and on the citation style guide used. There are many styles to choose from. Your teacher will tell you which style is preferred for your assignment. You can find many examples on the internet.
No matter which style you choose, pay close attention to the punctuation! The periods, semi-colons, and italics should be consistent in each.
These are examples of the MLA style, a commonly used style. Notice the reverse indentation in the examples. The first line of each entry is not indented but the following lines are.
Book
Last Name, First Name. Title of Book. City of Publication (if the publisher has more than one location),
Sellards, E.H.. Early Man in America: A Study in Prehistory. University of Texas Press, 1952.
Article
Author(s). "Title of Article." Title of Journal, Volume, Issue, Year, pages.
Gilmore, Kathleen. "La Salle's Fort St. Louis in Texas."" Bulletin of the Texas Archeological Society,
Webpage
Author. "Title of webpage or article." Title of website, Other contributors (editors), Publisher, Publication
Kenmotsu, Nancy. "Kiowa." Texas Beyond History, Editors Steve Black and Susan Dial, University of
The last step is to put all of you entries in alphabetical order according to the author's last name.
If you have done this list correctly, your reader should be able to see a citation in your paper, find the corresponding entry in your Works Cited and Consulted list, and be able to find the exact resource you used to do your research.
Congratulations! You have finished your paper! Now put your name on it and turn it in!